Month over month, my most popular blog post (thanks to Pinterest) is the DIY No Sew Knotted Headband. I wanted to add some additional content for the no sew headband lovers out there so here is another one made using a pair of L’s old tights.
I started by cutting off one of the legs and then using the toes as the top.
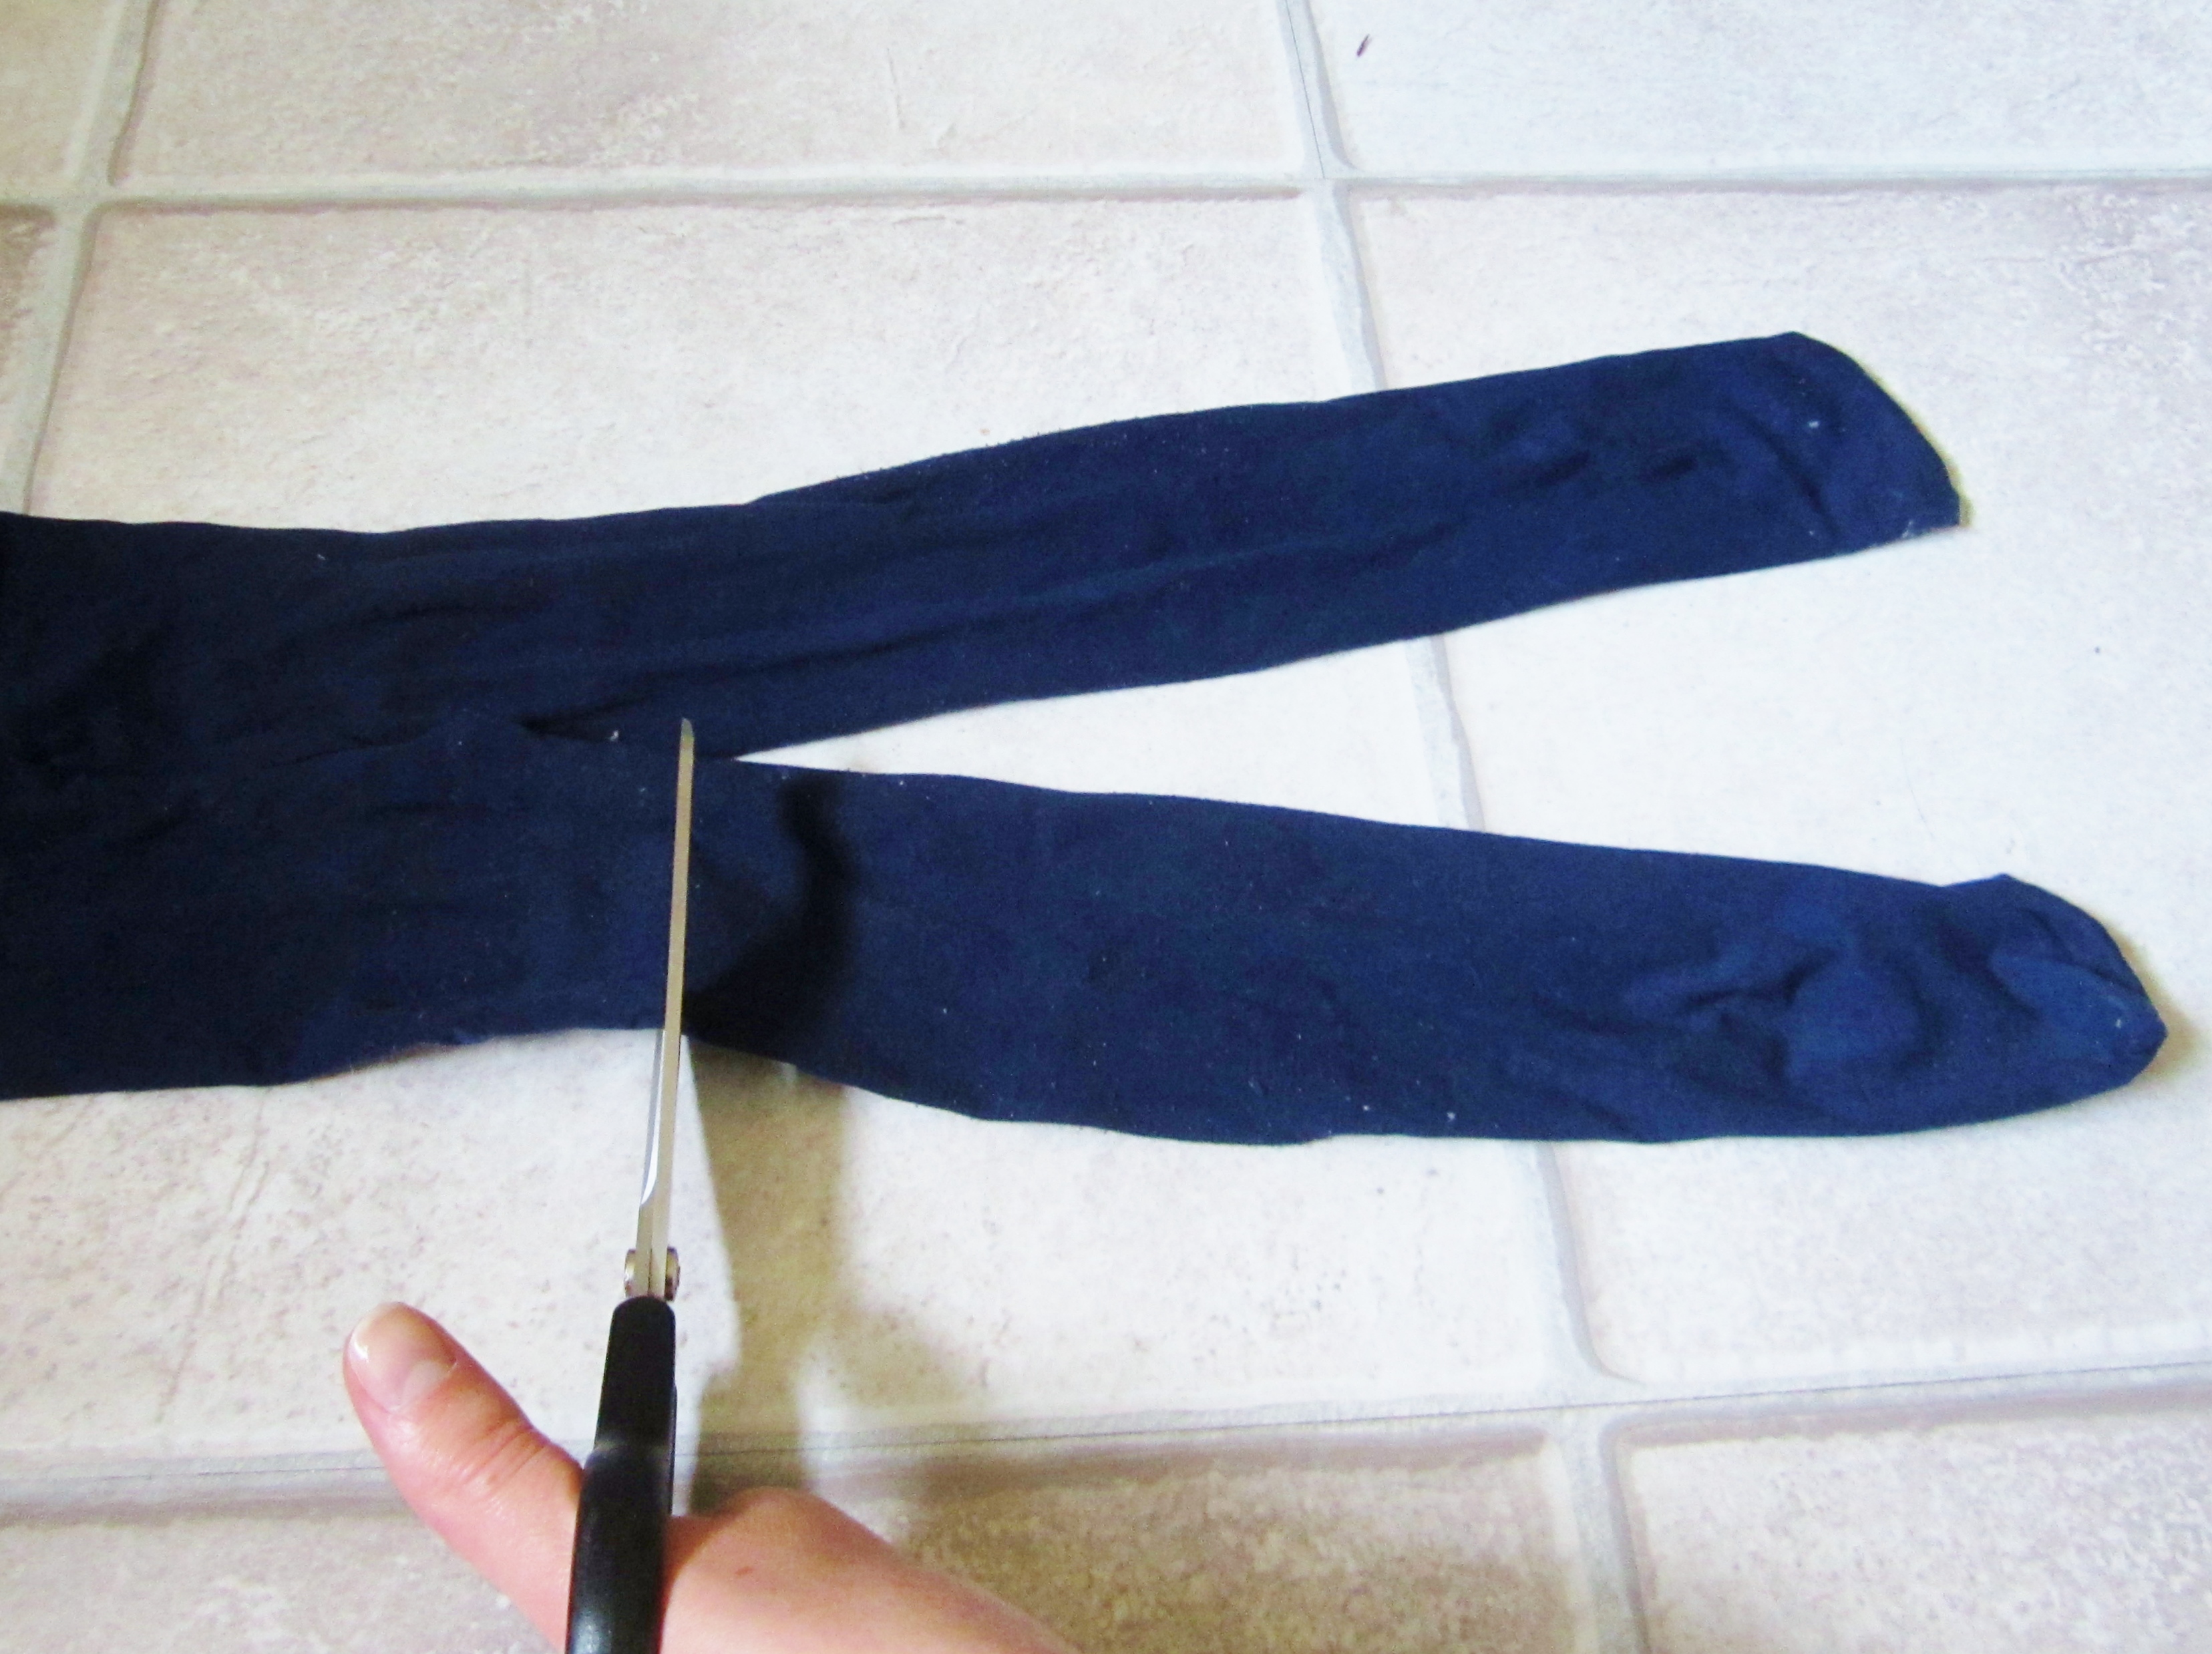

Starting at the bottom, I cut the leg into 4 equal(ish) pieces. Because you have the front and the back of the fabric, you will actually have 8 pieces but keep the front and back together so you are only working with 4. Be sure to not cut all the way through the toe.

Next you’ll want to pull each section so the edges roll in on themselves.

To braid the fabric, start with the piece on the left side. Move this piece over the piece on the right, under the piece further right, and over the piece the furthest right.

Continue this pattern all the way down.

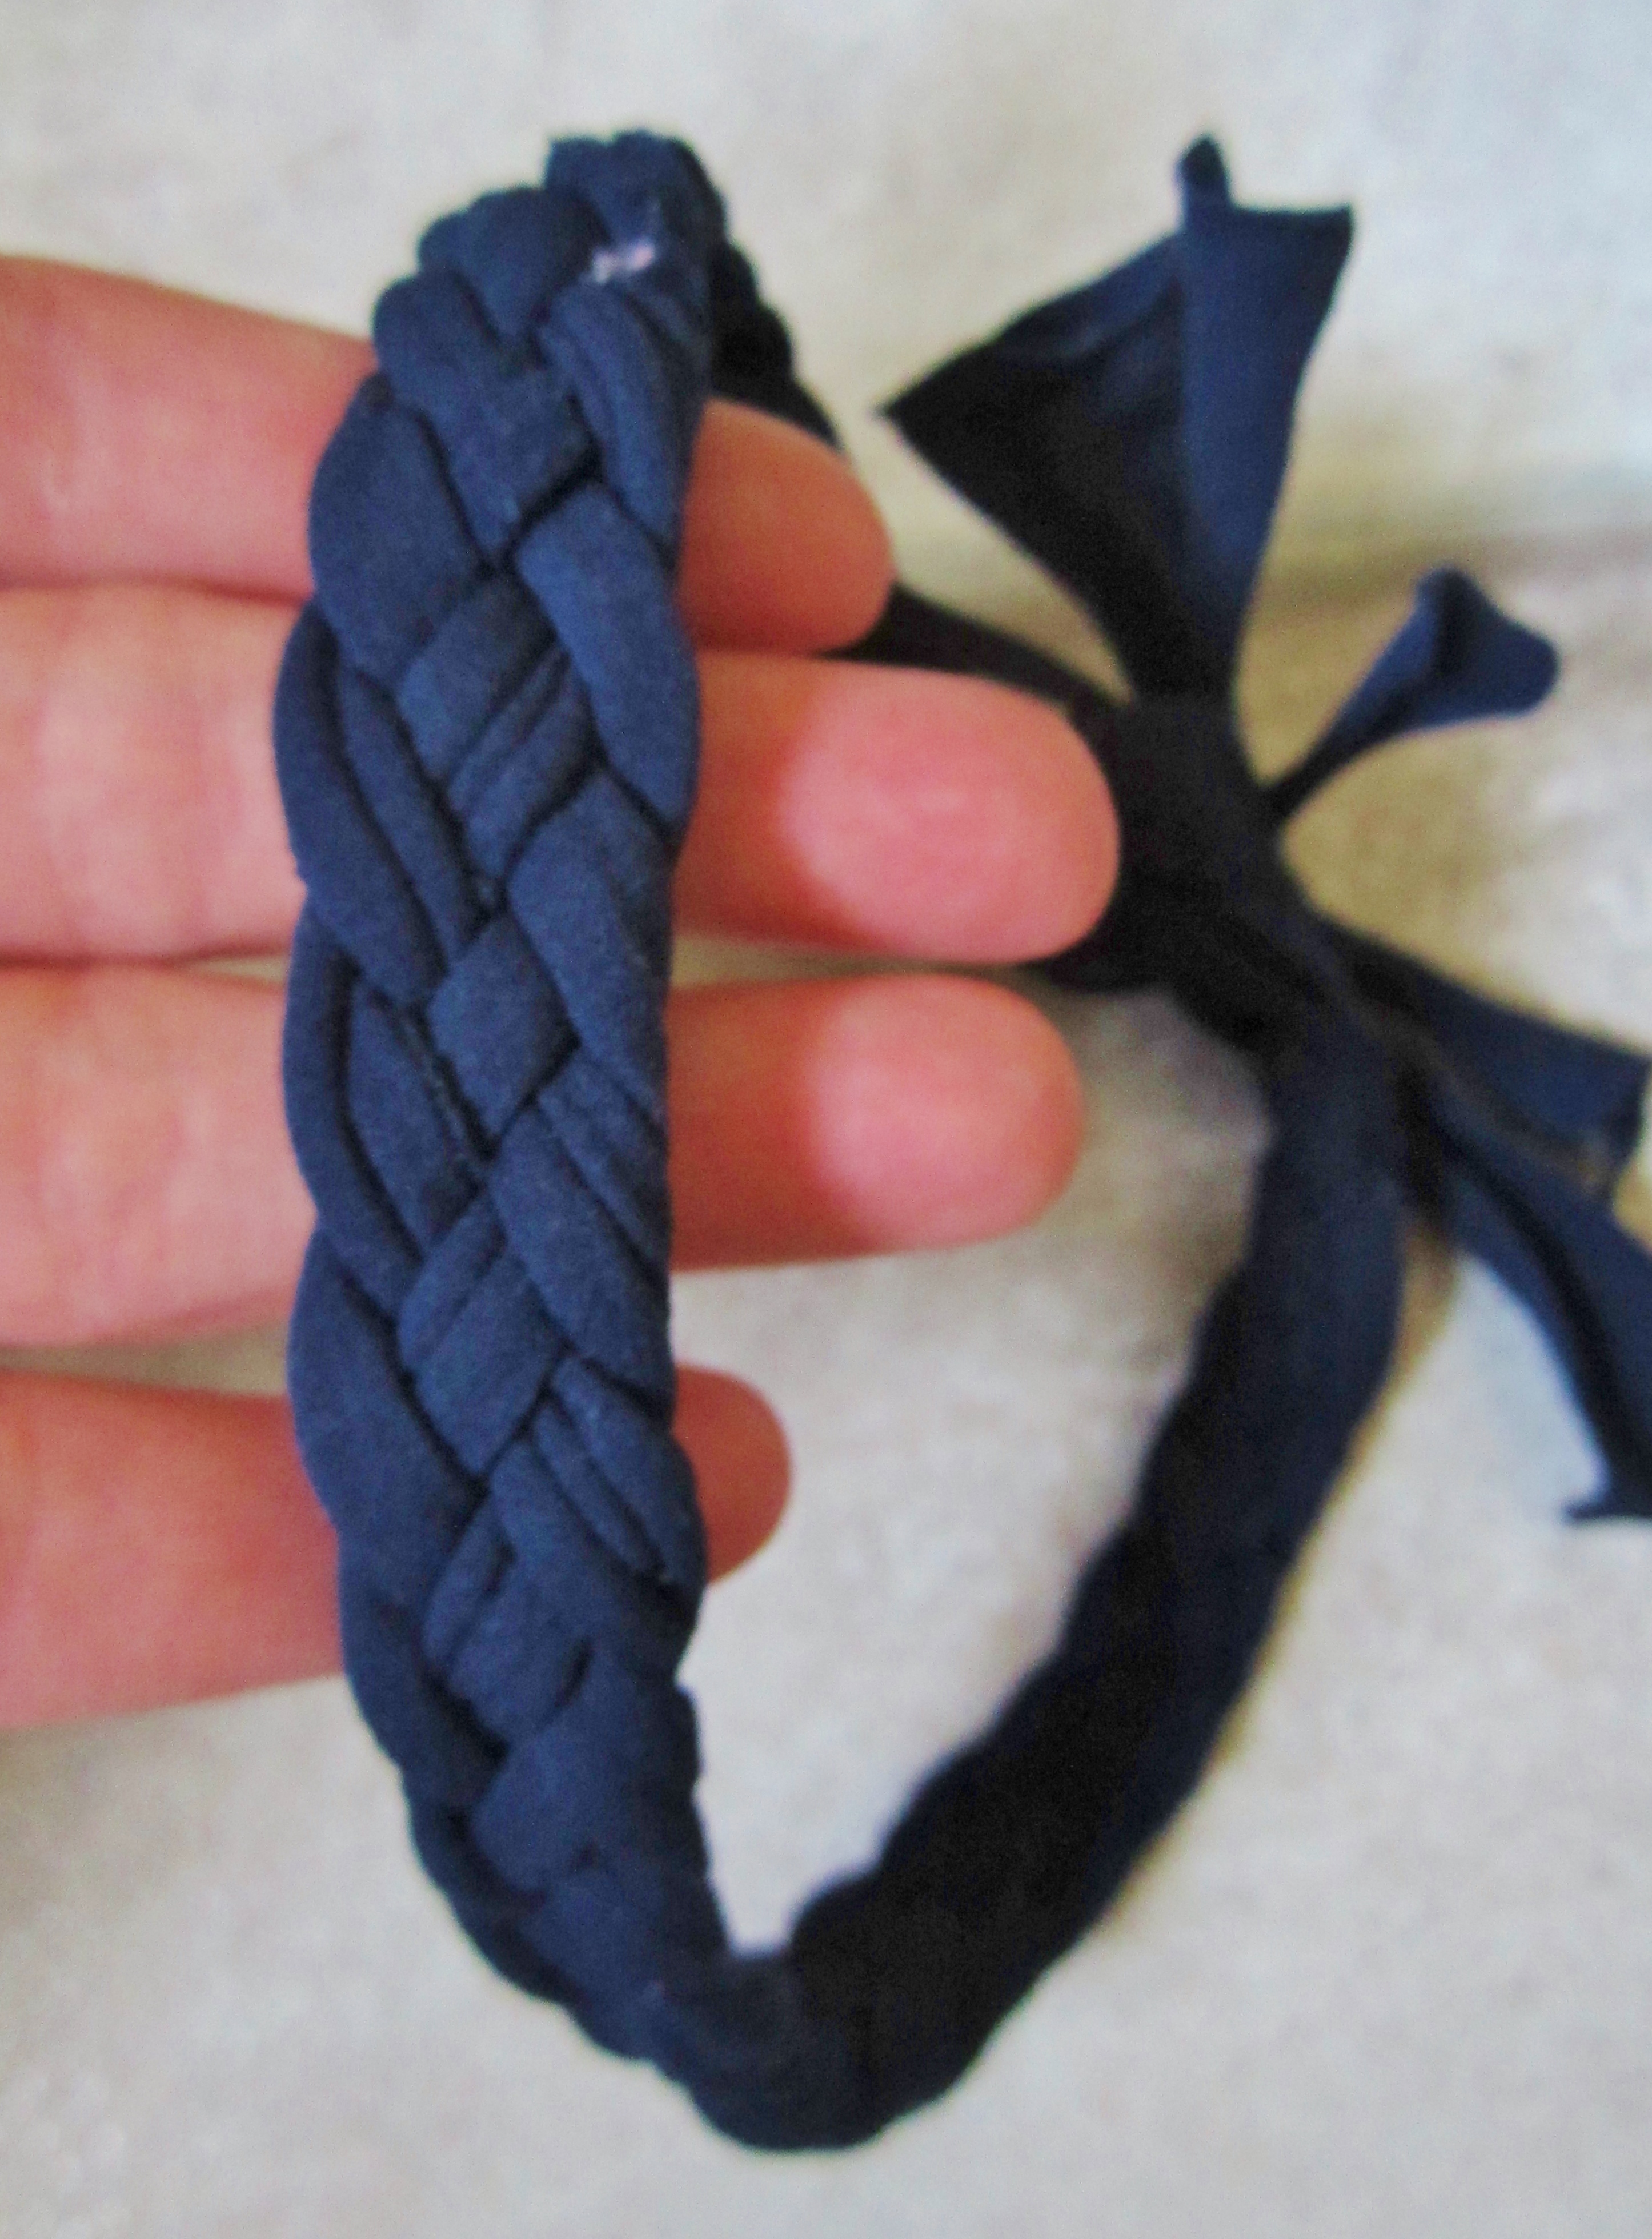
Once your braid is long enough to be a headband, knot off the 2 left pieces and the 2 right pieces.

Here is what it should look like at this point.

Tie the 2 end pieces around the loop at the top of the braid, made from the toe of the tights.

And there you have it. A diy no sew headband that only takes about 5 minutes to make.
L gave me her approval 🙂


This is so cool! Need to remember to try this later 🙂
Thanks! It was honestly super easy and quick to pull together!
Pingback: DIY No Sew Knotted Headband | The ELM Life
What size tights do you use?
I believe these were toddler tights… size 2-3.
I do not get the pattrn
Hi there! You start with the piece furthest to the left and then move it to the right in an over-under pattern. If the piece you are moving is #1, you would move #1 over #2, under #3 and over #4. This piece now becomes #4 and #2 becomes #1. Hope this helps!
Pingback: #DIY DIY No Sew Braided Headband – Best Home Decorating Ideas
Thank you for this xxx I upcycle my daughters school tights 😎 def more eco friendly
Tanks for pour explications
J’me not english
And i understood
Glad the pictures helped!